Over the next few posts (I’m not sure how many it’ll end up being), I want to explore the developing integration of N2WS version 2.4 and Veeam 9.5 Update 4. As you may know, N2WS Cloud Protection Manager is a, but I’ll say “the” leader in regards to data protection of AWS resources as it was designed as a cloud-native backup application specifically for AWS from the start. Thus, N2WS makes backup and restore of AWS resources easy!
As you may also know that for years, Veeam Backup and Recovery has made the backup of VMware and Hyper-V VMs easy! Because of this, Veeam has grown from…I’ll say $0 thought that’s not quite right to close to $1 Billion over the course of the last decade. And to become premier intelligent data management company, Veeam purchased N2WS in January 2018 to accelerate its cloud offerings by broadening its data manageability reach across physical, virtual, and ultimately multi-cloud environments.
To that end, with the release of N2WS 2.4 and VBR 9.5 Update 4, the platforms are increasingly integrated and we’re beginning to see the first fruits of Veeam’s data management vision…”availability for any app, any data, across any cloud“.
In this upcoming series of posts, I know we’ll look at N2WS Copy to S3, setting up External Repositories in VBR, as well as restoring data from an external repository to both on-prem and (cross my fingers) Microsoft Azure. As I work through this there may be other items to focus on, such as VBR Cloud Tiers but we’ll see what happens.
A Brief Overview of N2WS Copy to S3
For some time, N2WS has been able to perform DR backups. When a backup of an instance is performed, N2WS provides the capability to copy that backup to another region, thus making the restoration of an instance in another region a fairly straightforward task. With version 2.4 and similar to the DR backup feature, N2WS has introduced Copy to S3 which allows EBS snapshots to be saved to S3 buckets. In regards to data protection management, a Windows and Linux instances (as of this writing, Copy to S3 only supports backups of Windows and Linux instances) can now have a “standard” N2WS snapshot backup, a DR backup, and a backup stored on S3.
Under the Additional Resources heading at the bottom of this post, you’ll see a couple links that will provide you with more information that I’ll go into on this post. You can read all about what you can do with the Copy to S3 feature, but these two excited me the most:
- Lower your backup costs / reduce the number of snapshots
- Depending on your backup retention, you may experience reduced costs by moving long term backups from EBS snapshots to an S3 repository
- The N2WS S3 backups are stored in the Veeam VBR repository format as block-level incremental backups. S3 backups can certainly be used to restore data to AWS, but they can also be used to restore data on-prem and/or other public clouds! Yes, should I desire to, I can restore the backup of an EC2 instance within an S3 bucket to Microsoft Azure.
Some Things to Remember for Copy to S3
- As I stated above, Copy to S3 only currently supports backups of Windows and Linux instances. Other AWS services such as RDS and DynamoDB are not supported as of this writing.
- Most Copy to S3 operations require a worker instance (a t2.medium) that converts EBS snapshots to the Veeam format, writes data to S3, etc. When their tasks are completed, the worker instances are terminated.
- On the worker instances, you can configure their Region, VPC, Security Group, and Subnet settings, but you cannot change the instance type.
- If worker instances are not configured, N2WS will create one automatically using the same Region, VPC, Security Group, and Subnet as the N2WS appliance. Automatic worker instance creation is acceptable if you plan to use Copy to S3 for instances belonging to the same account and residing in the same region as the N2WS appliance.
- When creating an S3 Repository within the N2WS admin console, you do NOT have the option of creating a new bucket. An S3 bucket must exist prior to configuring it as an S3 Repository within the N2WS admin console.
- I created a bucket in the same region as my N2WS instance
- The S3 bucket created for use as an N2WS S3 Repository must have AWS encryption enabled, versioning should be disabled, and this bucket should not be used by any other application…don’t direct backups to the same S3 bucket you’re using for log consolidation.
- In order to use Copy to S3, the “cpmdata” policy must be enabled.
- Use an AWS S3 endpoint to enable instances to use their private IP to communicate with S3 within the AWS network to eliminate network transfer fees.
- Review the Additional Resources at the bottom of this post for a more details.
Configuring Copy to S3
Though I feel I’ve spent a great deal of time writing about the Copy to S3 feature, the process to actually implement is pretty simple:
- Create an S3 bucket
- Open the N2WS admin console to perform the following:
- Create an S3 Repository
- Enable Copy to S3 on one or more backup policies
- Configure worker instances if backing up and restoring S3 data across accounts and regions. For this introductory series, I will be using a single AWS account and region thus I will not be configuring worker instances.
- Test and Monitor
- Open the AWS Management Console, launch the S3 dashboard, and create a new S3 bucket. Remember to enable encryption and disable Versioning.

- With the S3 bucket created, use your preferred internet browser to connect to the N2WS admin console and enter appropriate credentials. Click S3 Repositories | Create New S3 Repository.

- On the Create S3 Repository screen, enter a Repository Name, select an AWS account that has access to the bucket, the AWS Region, the AWS Bucket Name (name of the bucket created during step #1), and if desired, enable encryption to use client-side encryption that is independent of the AWS-provided bucket level encryption. When satisfied with the selections, click Create.

- After the S3 repository is created, click Policies. Under the Configure heading, click Copy to S3 to configure S3 backups for a given policy.

- On the Backup Copy Settings screen, enable Copy to S3, select the appropriate S3 Repository, and enter the desired Copy Every variable. If Copy Every is set to 1, then backups will be copied to S3 every time a backup policy is executed. In regards to retention settings, I decided to keep it simple and to keep 1 month of backup data in S3 I disabled Generation Retention, enabled Time Retention and set the Retention Duration to 1 months. Set the retention settings in accordance to your organizational policies and click Apply to save the settings. Note that the backup copy settings can be changed at any time after creation should your retention policies change.

- Really that’s kinda it for configuring Copy to S3….easy right? To test immediately, click run ASAP under the Operations heading for the newly configured policy. You’ll see the “regular” backup begin and complete then the S3 copy will start. The S3 Copy Status will sit at 0% until the worker instance boots and connects to the N2WS appliance. Once the connection is made, the S3 Copy Status will show a percentage complete as shown below. Once the S3 copy successfully completes, the worker instance will be terminated.


Restoring from S3
Not only is sending backup data to an N2WS S3 repository is easy, but restoring from S3 is easy as well but remember this:
- Restoring from S3 is not as fast as restoring from a snapshot. I’ve been told that restoring from snapshots is 3x faster than restoring from S3. So if a snapshot restoration takes 1 minute, that same restoration from S3 could take 3 minutes. This is why you should retain some measure of EBS snapshots for quick recovery, maybe a week, maybe two…there’s not necessarily a right answer.
- When restoring from S3, you can restore instances or volumes. Individual file restores from S3 using the file explorer is not currently available.
- Within the N2WS admin console, click Home | Backup Monitor
- Locate the backup from which you wish to restore files from S3 and under the Actions heading, select Recover.
- On the Recovery Panel page, select S3 repository under the Restore From heading. When you do so, you see the Instance and Volumes Only Recover options. Click your desired recovery option.

- On the Volume Recovery page (shown below), select the desired volume recovery options and click Recover Volumes. If desired, you can attach this volume to an EC2 instance that exists within the Zone in which you are recovering.

- At this point, a worker instance will be launched to restore the volume. Once the recovery of the volume successfully completes, the worker instance will be terminated.

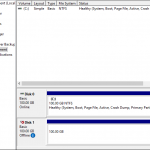
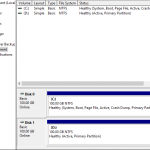
- In this example, the recovered volume was attached to Windows EC2 instance. The new disk was brought online, given a drive letter, and at this point the contents of the volume are available for use at your discretion. Copy a single file from it if that’s all you need, keep the entire restored volume attached to this Windows server, etc.
Final Thoughts and Additional Resources
Hopefully I’ve been able to show you that enabling the new Copy to S3 feature of Veeam/N2WS is simple, yet extremely useful and powerful and I also hope that in at least some small measure, you’re excited (or intrigued) about the data protection possibilities that will undoubtedly result from the continued integration of Veeam and N2WS.
On the next post, we’ll look into setting up the Copy to S3 bucket as an External Repository on a VBR server. Remember, Copy to S3 backups are stored in the VBR repository format as block-level incremental backups which allows us to restore data on-prem and/or other public clouds using the VBR console!
In addition to this post, I am sure you will find the following resources very helpful as they go into more detail about the capabilities of Copy to S3:


do you have more information about it?
good articel